How to Install Joomla! CMS?
If you're creating new website, follow documentation for installing RcaTheme Quick-start package instead of below documentation.
What is Joomla?
Joomla!® is an Open Source CMS (Content Management System), it was first released in 2005. Joomla! is easy to use, stable, secure and trusted by millions of websites worldwide. Joomla! has thousands of free and commercial extensions and templates by using you can build simple to enterprise level websites including Personal, Business, E-commerce, Social Network etc.
Joomla! Server Requirements
Before Installing Joomla! make sure your server support following Joomla requirements for best performance.
- Supported Software
- PHP - 7.0+
(Magic Quotes GPC, MB String Overload = off)
(Zlib Compression Support, XML Support, INI Parser Support, JSON Support, Mcrypt Support, MB Language = Default)
- PHP - 7.0+
- Supported Databases
- MySQL - 5.5.3+
(InnoDB support required) - SQL Server - 10.50.1600.1 +
- PostgreSQL - 9.1+
- MySQL - 5.5.3+
- Supported Web Servers
- Apache - 2.4+
(with mod_mysql, mod_xml, and mod_zlib) - Nginx - 1.8+
- Microsoft IIS - 7
- Apache - 2.4+
Installing Joomla
For installing Joomla! you need to:
- Download the Joomla! from its official website.
- Upload Joomla file to your server.
- Create database
- Start installation.
- Download the Joomla Package
- Download Joomla from its official website https://downloads.joomla.org
- Upload Joomla file to your server.
There are two possibilities for uploading the Joomla file to your server.
- The best option is to use the cPanel. If your host has cPanel, you can upload the Joomla Package archive in your Public HTML folder and to Extract it there. By doing this you will avoid any Joomla file losses.
- Login to your cPanel
- Click on File Manager
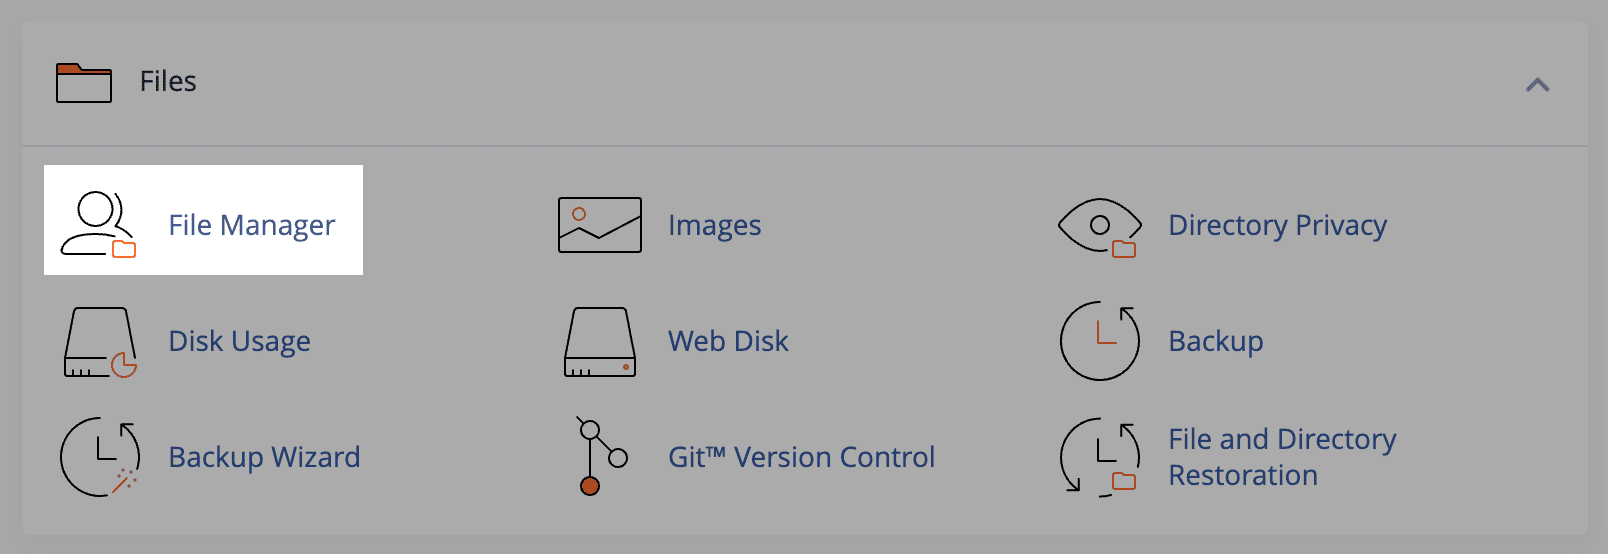
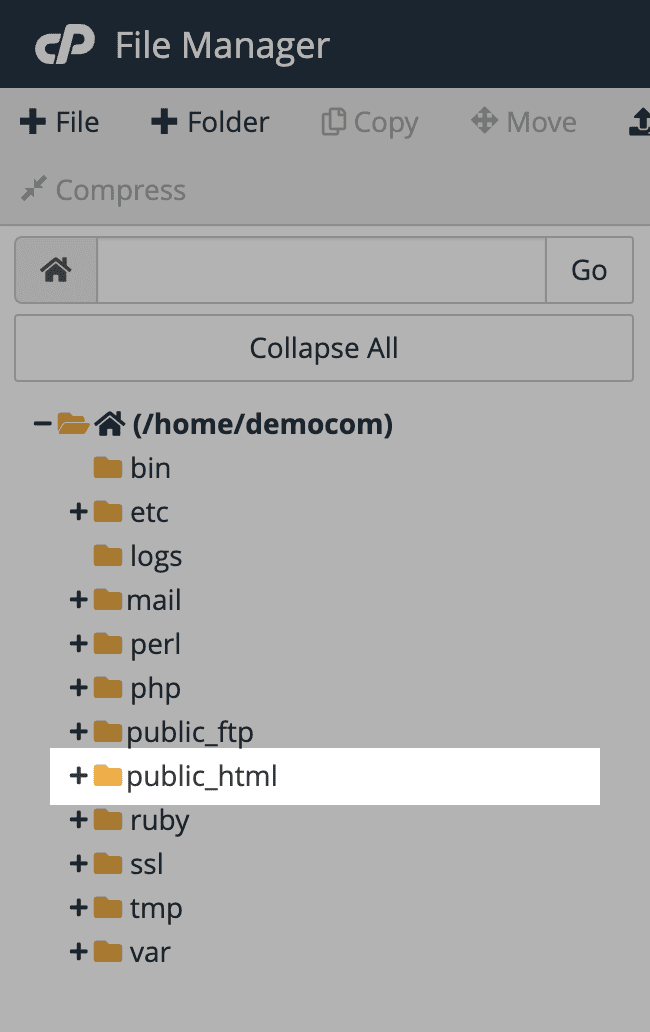
- Select Public HTML or any other folder you want to install.
- Now click Upload
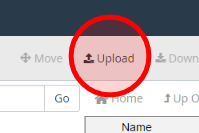
- Now select or Drag & drop the Joomla file
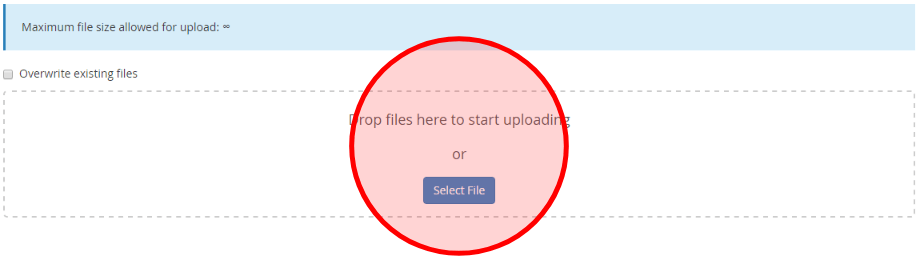
- After finish go back to File Manager
- Now select the Joomla zip file you just uploaded, and click on Extract

- The second option is to upload extracted files using an FTP client.
- Extract Joomla Zip file to your local PC
- Connect your server using an FTP client, example: FileZilla
- Move to the public_html root folder or a sub folder (where you want to install Joomla)
- Now Drag & Drop all of extracted Joomla files from your PC to server
- Make sure, every single files and folders uploaded successfully.
- The best option is to use the cPanel. If your host has cPanel, you can upload the Joomla Package archive in your Public HTML folder and to Extract it there. By doing this you will avoid any Joomla file losses.
- Create database
- Create a database using cPanel MySQL Database Wizard.
- For more information about how to create database check here
- Start installation
Now you are ready to install Joomla (Quickstart package).
Start the Joomla! web installer by opening your favourite browser and browsing to the site's domain name. On host installation you will use http://www.yoursitename.com. If your are installing Joomla! locally, you will use http://localhost/[path to quickstart package files], and you should see the installation screen.
- Main Configuration:
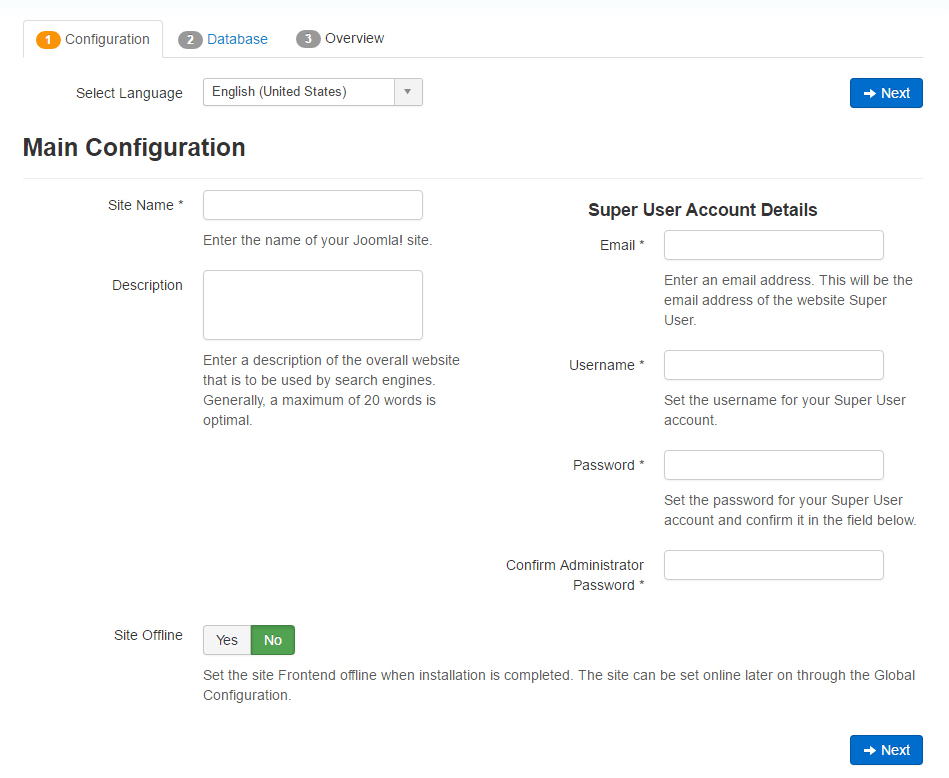
Fill in the following information.
- Site Name: the name of your website — this can be changed at any point later in the Site Global Configuration page.
- Description: enter a description of the website. This is a global fallback meta description used on every page which will be used by search engines. Generally, a maximum of 20 to 25 words is optimal. Again, this can be changed on the Site Global Configuration page at any time.
- Admin Email Address: set the email address for the Super Administrator of your site.
- Admin Username: set the Super Administrator username.
- Admin Password: set the Super Administrator password. Enter it again in the Confirm Admin Password field to ensure your password is correct.
- Site Offline: When this option is set to Yes the front-page will show Offline page, which prevents visitors from seeing the complete site before it’s ready.
When everything on the first page is completed, click the next button to proceed:
- Database Configuration
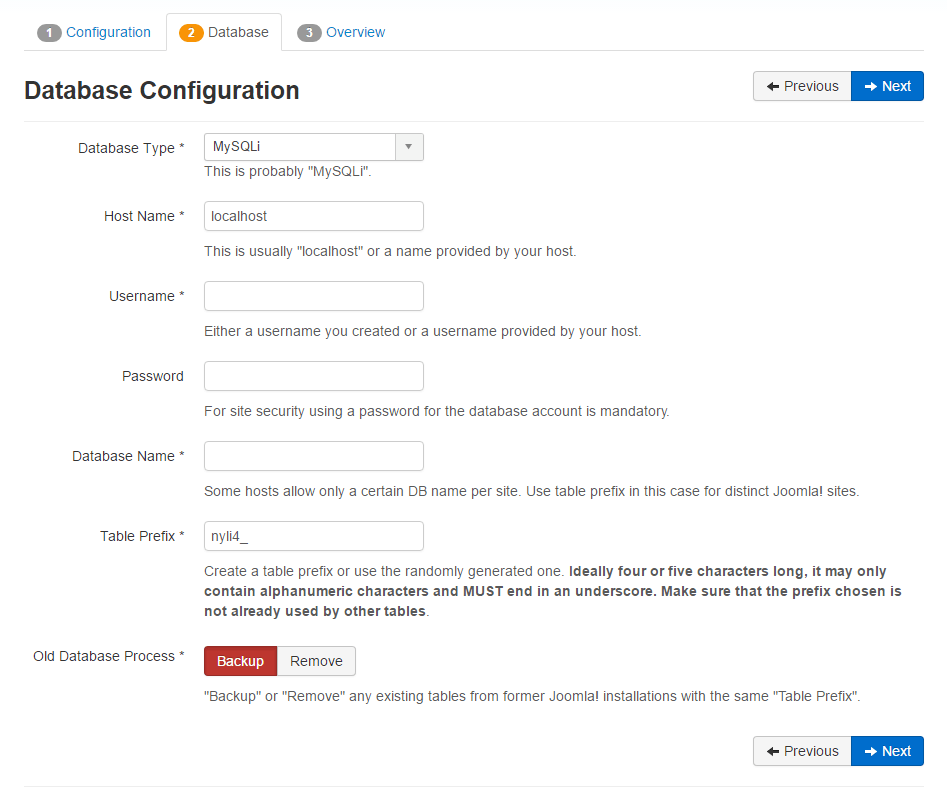
On this page you’ll need to enter the database details you created earlier
- Database Type: MySQLi is the common database used
- Hostname: Where is your database located? Common is
localhost, but some hosts use a specific database server such asdbserver1.yourhost.com - Username: the username used to connect to the database
- Password: the password for the database's username
- Database Name: the name of the database
- Table Prefix: one is generated automatically, but you can change it. Just don't forget to put the underscore character (_) at the end of the prefix.
- Old Database Process: should the installer backup or delete existing tables during the installation of new tables? Click, Yes or No to select the choice.
When all the information has been filled in, click the next button to proceed:
- Finalise
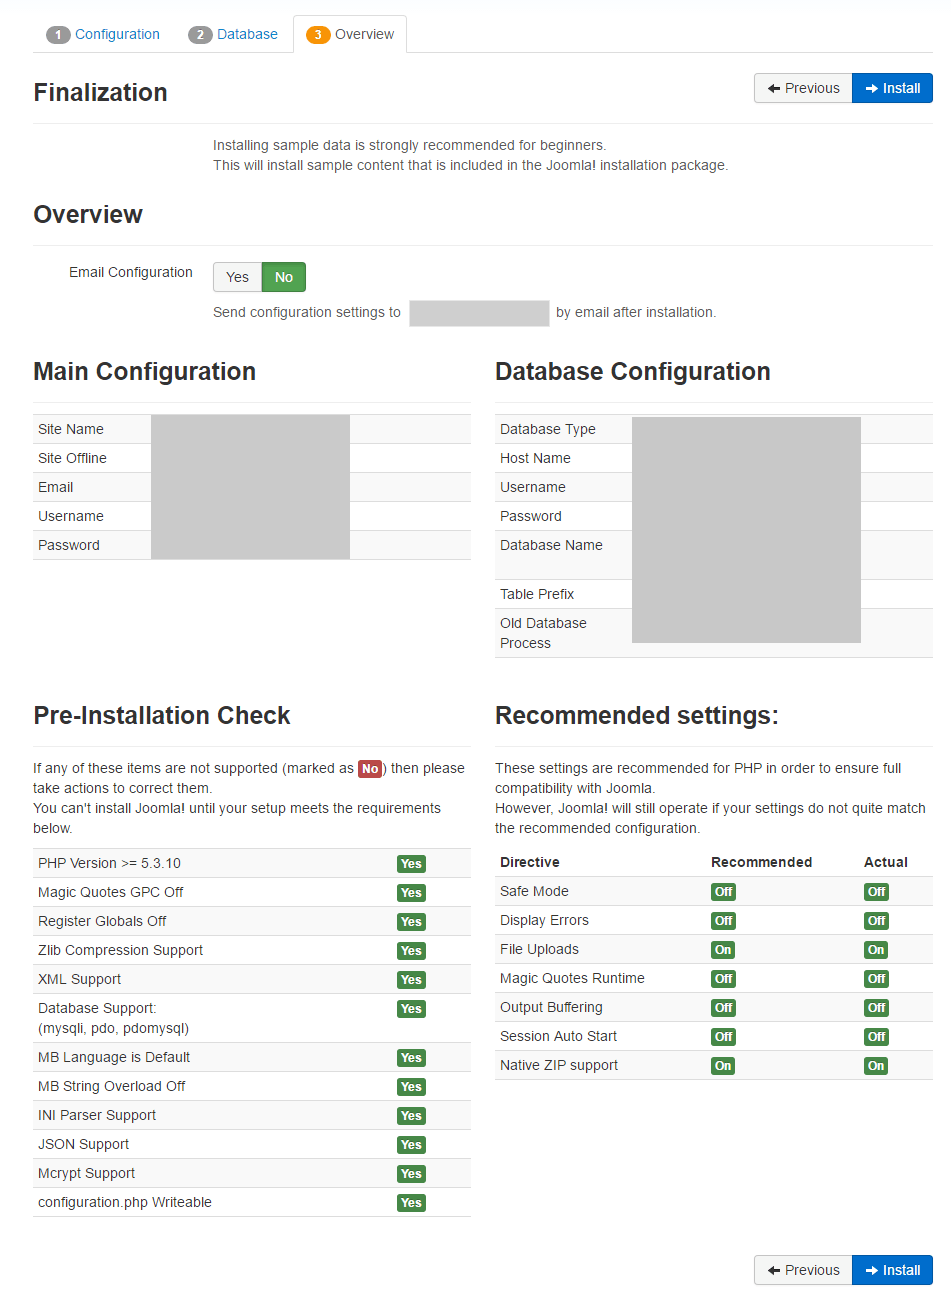
It is now time to finalise the Joomla! installation. The last page of the web browser installation contains all the information about the installation. This includes the options(at the top) for installing sample data and the installation's configurations(at the bottom).
- Install Sample Data: This area mentions that your template’s demo content will be installed.
- Overview: You can at this time choose to have the configuration settings emailed to you. If the Email Configuration choice is selected, the Email Password choice will appear. The email password is off by default for security. You can choose to have the password included, just click Yes.
- Main Configuration: all the website specific information, such as the website name, description, admin username, etc.
- Database Configuration: contains the information about the database Joomla! will use.
- Pre-Installation Check: these requirements must all be shown as Yes, otherwise you will not be able to install Joomla! With the exception of the PHP Version, the rest are usually controlled in the php.ini. You may need assistance from your host in correcting these settings or checking to see if it is possible to adjust them.
- Recommended Settings: these are settings are recommended in your PHP configuration, but will not prevent Joomla! from being installed. You can refer to the above instructions on how they may be changed.
After you click the Install button, you should see a progress bar with additional information of the installation. Once the installation completes, you should see the success page!
- Success and Finishing Up the Installation
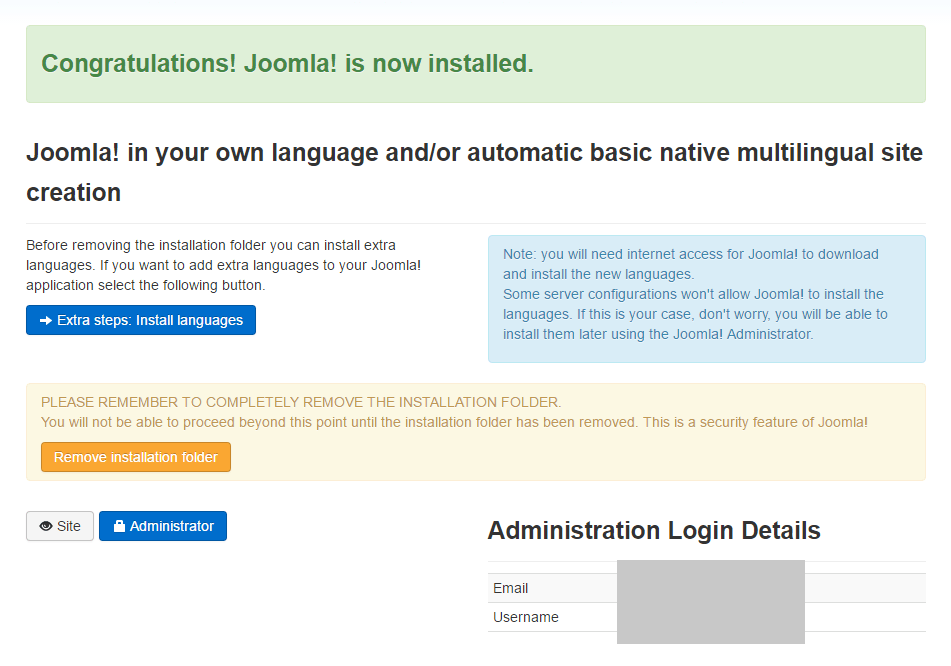
Congratulations! Joomla! is now installed. You can choose to install additional language packs by clicking on the Extra Steps – Install Languages button. Once done, there is one last step to complete the installation. You must delete the Installation Folder. Click on Remove Installation folder and a success message will appear. Now you can navigate to the Administrator log in by clicking Administrator or go right to your site by clicking Site.
- Main Configuration: